Node’s Command Line Interface
The node command (which is often called the CLI) can be used in 2 modes:
-
To execute a script by using a file path argument:
$ node file.js -
To start a REPL session by not using a file path argument: $ node
We talked about these 2 modes in the previous article, but there is more you need to know about the node command.
The command’s options
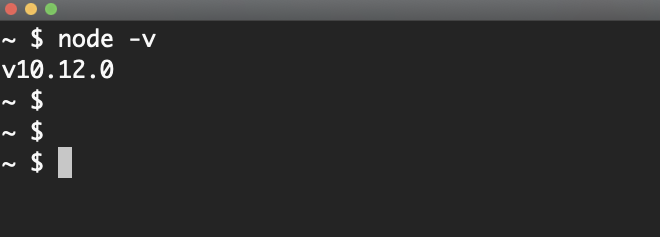
The node command has some options that make it work differently. For example, the -v option makes it output the version of the currently running Node runtime:
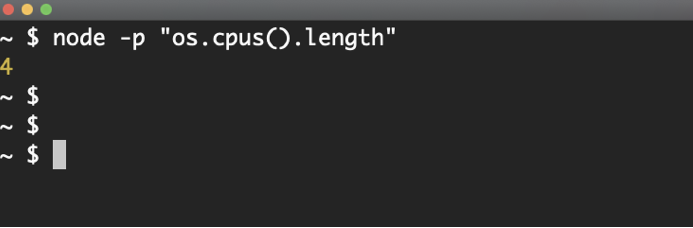
The -p option makes it execute a JavaScript line and print out its result, which I found super useful! For example, if I want to see how many CPU cores my machine has, I can use a call to the built-in os module, which has a function named cpus that returns an array of objects each representing one logical CPU core on the machine. I just need to check the size of that array to count them:
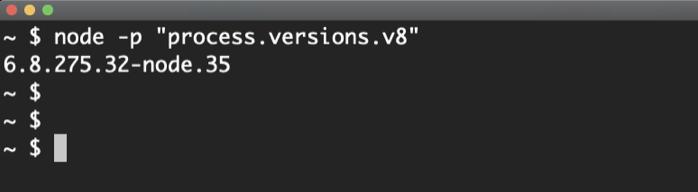
Similarly, here’s another one-liner to see the version of the V8 used in the current Node installation:
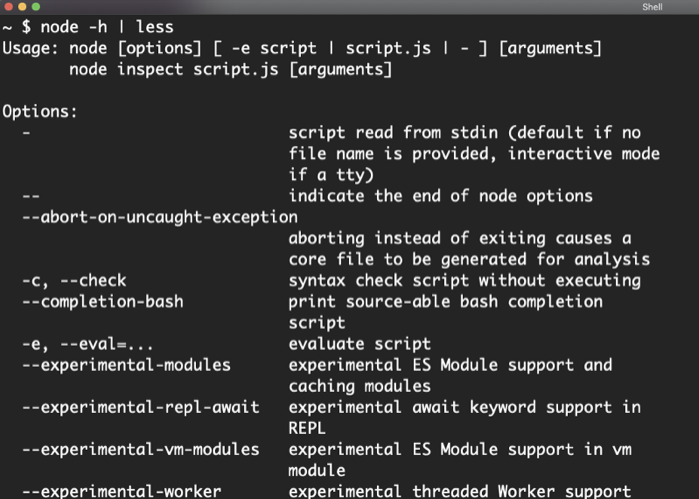
There are many other options for the node command; you can see a full list by using the -h option. Take a look at these options and familiarize yourself with them. Don’t memorize them but just be aware of all the things that you can do with the CLI:
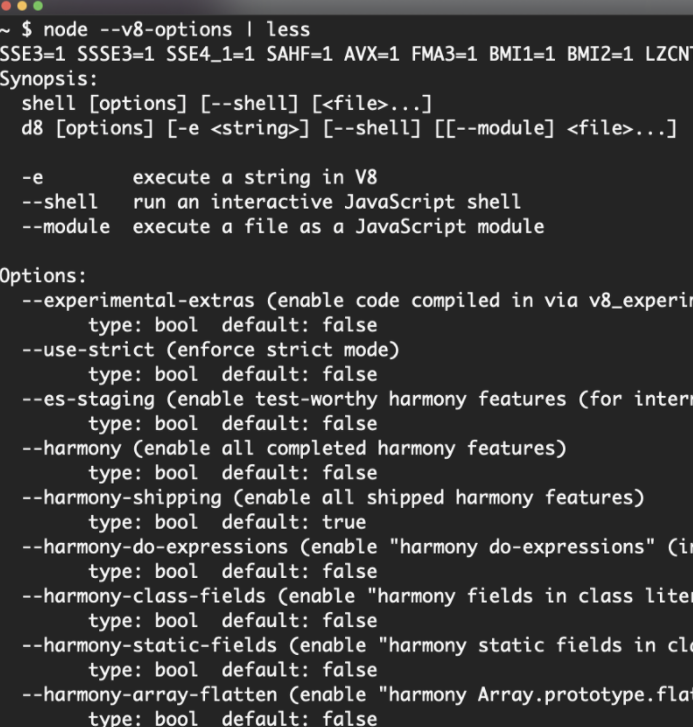
One of the node command’s options opens the door to the options of V8 itself. Run the node command with --v8-options and it will report all the V8 options it supports:
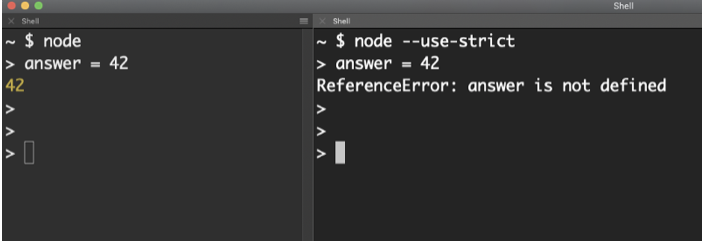
These options get passed to V8 under the hood. For example, to make V8 always execute your JavaScript in strict mode, you can pass the --use-strict option:
In my current Node installation, I see more than 400 V8 options! These options are mostly for advanced use, but you should know a few things about them:
-
Notice the options that begin with the word harmony. These flags usually control the experimental features that are still being tested. You can use these experimental features by providing their harmony flag to the node command.
-
Notice the options for tracing. If you need V8 to give you more debugging power, you can make it output more information using these options.
-
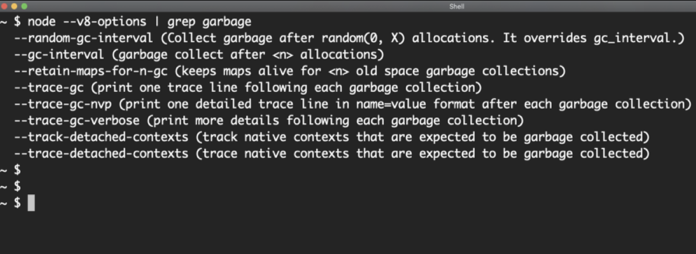
Some options control V8’s limits and how it behaves in general. Other options will report information or give you control over what’s usually not available without them. For example, notice the following options that will let you control the garbage collection process:
Node’s Environment Variables
In addition to all the options you can use with the node command, it also supports some environment variables that you can use to change the behavior of any running Node process.
You can see the full list of the supported environment variables at the end of the -h output:
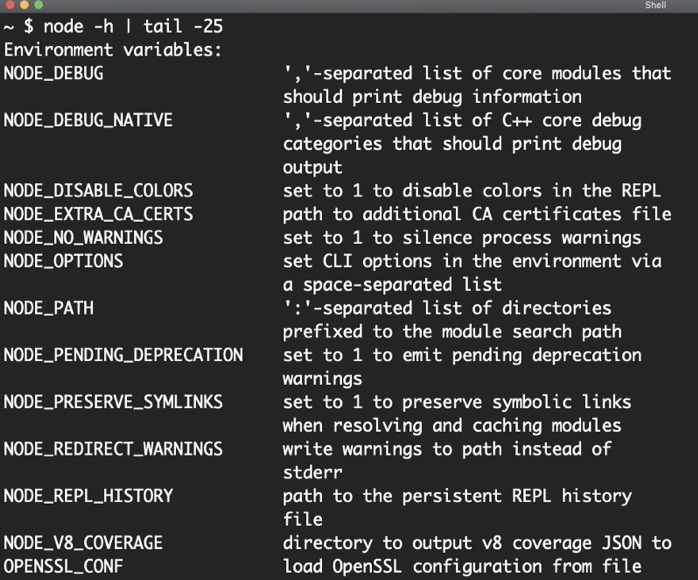
For example, the NODE_DEBUG environment variable instructs core modules to print out any debug information they have.
Remember the “Hello World” example from the previous article? If you execute it with NODE_DEBUG set to http (which is the core module used in that example), the http module will print out some debugging messages on each incoming connection:
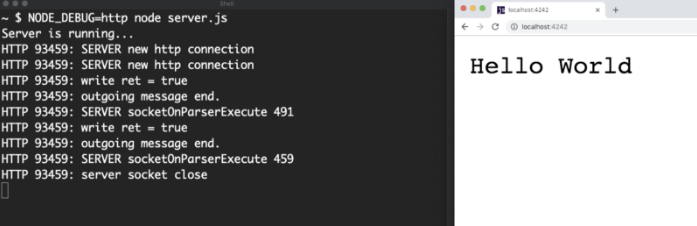
Most Node libraries (both built-in and external) support a NODE_DEBUG value. You can give this environment variable a comma-separated list of the modules for which you want to enable debugging.
Another handy environment variable is NODE_PATH. By default, node has certain paths it uses to lookup the modules you require in your code and you can use this environment variable to override that. I sometimes use this when developing local node packages because I find it a lot simpler than the alternatives.
The built-in environment variables are cool, but did you know that you can have your Node process use your own custom environment variables as well? Let’s talk about that next.