Node’s REPL Mode
Let’s explore the node command. When you type the node command without a script for it to execute, Node will start a REPL session.
REPL stands for Read, Eval, Print, Loop. It’s a very convenient way to quickly test simple JavaScript and Node commands. You can type any JavaScript code in the REPL. For example, type Math.random() and then, press Enter:
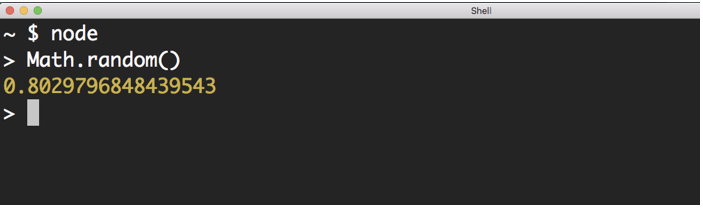
Node will Read your line, Evaluate it, Print the result, and Loop over these 3 things until you exit the session (which you can do with a CTRL+D).
Note how the Print step happened automatically. We didn’t need to add any instructions to print the result. Node will just print the result of each line you type. This is cool, but keep in mind that some lines will not have any results at all. The Node REPL will print “undefined” in that case.
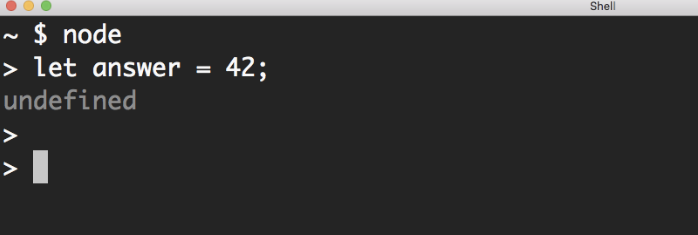
For example, if you typed:
let answer = 42;This is a statement in JavaScript. It’s not an expression. It does not have any output. When you hit Enter, you’ll see that the REPL prints undefined as the output of this statement. Don’t let that confuse you.
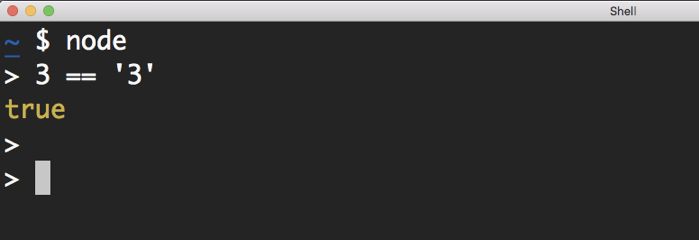
On the other hand, if you type an expression, for example:
3 == '3'This is a Boolean expression. The REPL will print its result for you:
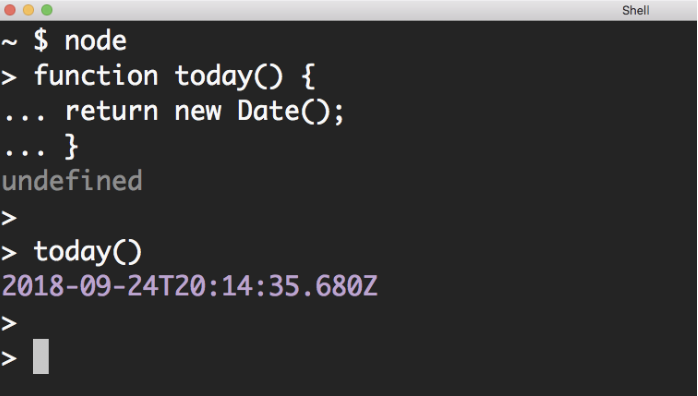
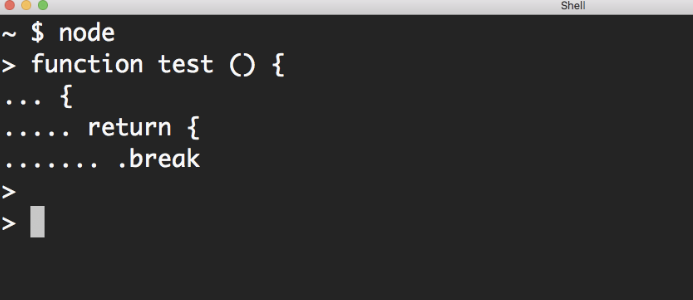
Sometimes, the expression that you need to test might need multiple lines. For example, say that you want to define a function that generates today’s date and test it out. You’ll start with the function name and begin with a curly brace. You hit Enter there:
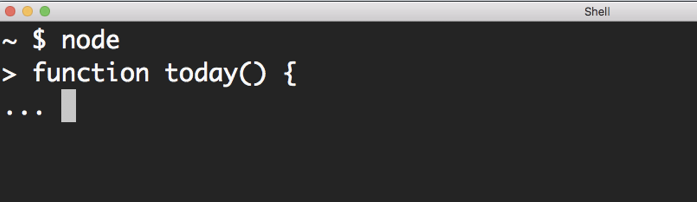
The Node’s REPL is smart enough to detect that your code is not done yet and it will go into a multiline mode for you to type more. If you finish a valid function definition, you’ll get out of this multiline mode:
This REPL multiline mode is limited. Node has a more featured editor right inside the REPL. You type .editor to open it up and when you do, you can type as many lines as you need. For example, you can define multiple functions or paste code from the clipboard:
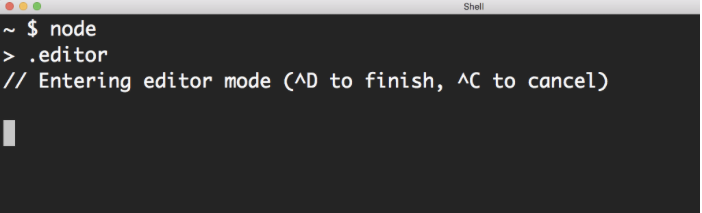
When you are done typing, you hit Control+D to have the REPL evaluate your code. All the functions you defined in the editor will be available in your REPL session.
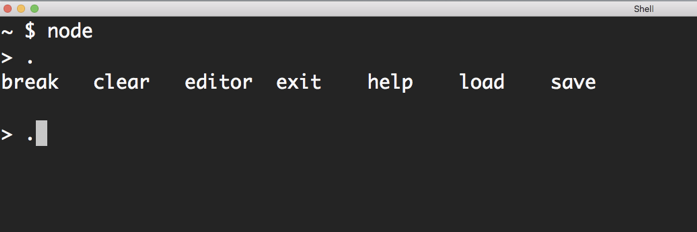
The .editor command is a REPL special command. There are a few other special commands. You can see the list by typing the .help command:
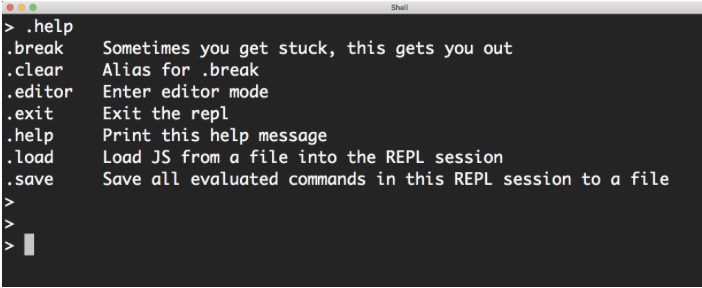
The .break command (or its .clear alias) lets you get out of some weird cases in a REPL session. For example, when you paste some code in Node’s multiline mode and you are not sure how many curly brackets you need to get to an executable state. You can discard your pasted code by using a .break command. This saves you from killing a session to get yourself out of simple situations like this one.
The .load and .save commands can be used to generate and use external Node scripts inside your REPL. This can be a great time saver.
Use The TAB Key!
I need to emphasize the importance of the TAB key. If you are not familiar with this powerful key, you’re in for a treat!
The TAB character itself is not a useful one, but the TAB key is the driver of a very powerful feature called TAB-Completion. You might be familiar with that feature in your code editor, but I’d like you to also be aware that it works inside Node’s REPL as well.
A single TAB in Node’s REPL can be used for autocompletion, and a double TAB (which is pressing the TAB key twice) can be used to see a list of possible things you can type from whatever partially-typed string you have.
For example. If you type the character c and then double TAB on that, you’ll see all the possible keywords and functions that start with c:
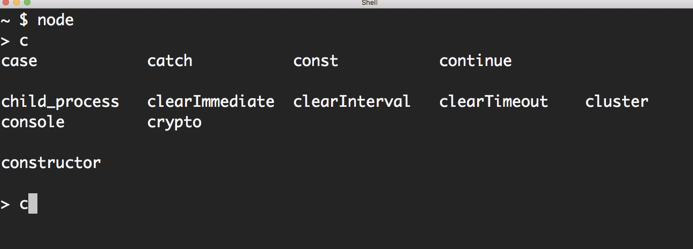
If you single TAB on something that matches only a single option, it’ll be auto-completed. For example, crypto in the list above is the only keyword that begins with cr. So, if you single TAB after typing cr, crypto will be auto-completed.
This is not about being lazy and not wanting to type the whole thing. The usefulness of this TAB-Completion is about avoiding typing mistakes and discovering what is available.
This latter point is important. For example, say I want to know what API functions and properties I can use on the Array class. I can type Array and then I can type the . character and double TAB after that:
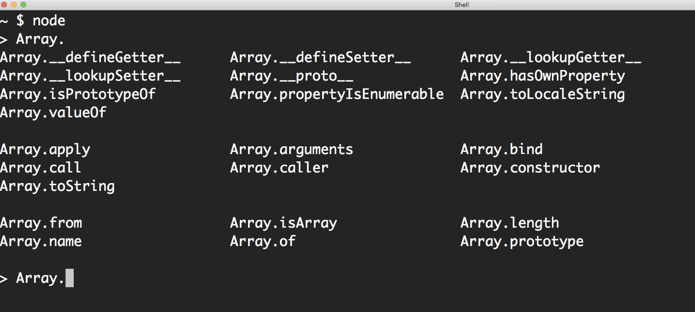
All the functions and properties that can be used from the Array class.
TAB-Completion also works on objects. If you have an array object in the REPL session, you can use the same . character then double TAB trick to get a list of all the methods available on that object:
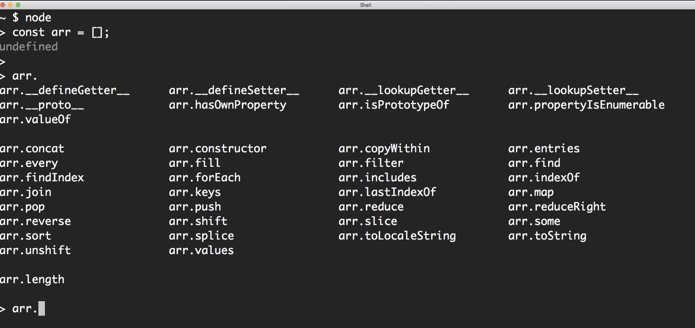
Can’t remember the name of a method you need? TAB-Completion can help.
The TAB-completion discoverability works anywhere within the REPL session. For example, you can see the special dot commands by double tabbing on a single . character:
This discoverability also works on the global level itself. If you double TAB on an empty line, everything that is globally available in Node appears. This is a big list, but it’s a useful one:
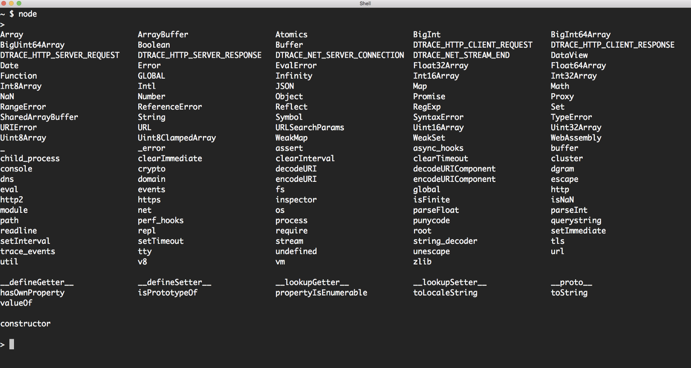
In this list, you can see all the common globals in the JavaScript language itself, which you’re probably familiar with, like Array, Number, String, and Object classes, built-in libraries like Math and JSON, and some other top-level functions. This list also has the globals that are available in the Node runtime itself. A few of these are truly globals in Node, like the Buffer class, the process object, and the various functions to set and clear timers. The lowercase variables in this list (like dns, net, cluster, http, …) represent the built-in modules in Node. These are the powerful libraries that you get out of the box. Note that these are available directly in a REPL session, but when working with a regular Node script, you will need to require these modules first to be able to use them.
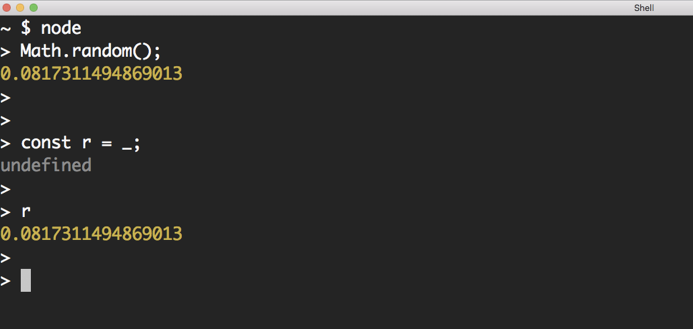
One of the useful REPL’s features that you can see in the list above is the (underscore) variable. This is similar to the $? feature in Bash. It stores the value of the last successfully-evaluated expression. For example, say that you executed a Math.random() call, and after you did, you wanted to put that same value in a constant. You can do that with because it automatically stores the last value.