Exploring GraphQL APIs
The easiest way to start learning about the powerful features of the GraphQL language is to use its feature-rich interactive in-browser IDE. This IDE leverages GraphQL’s type system to give you features that you can use to explore what you can do with GraphQL and to write and test your GraphQL requests without leaving your browser. Using this IDE, we’ll continue to explore examples of GraphQL queries and mutations. We’ll look at the fundamental parts of a GraphQL request, we’ll test examples from the official GitHub GraphQL API, and we’ll also test a GraphQL backend-as-a-service tool.
1. The GraphiQL Editor
When thinking about the requests that you need your client applications to make to servers, you could benefit from a graphical tool that can help you to first come up with these requests and then test them before you commit to them in application code. Such a tool can also help you improve these requests, validate your improvements, and debug any of the requests that are running into problems. In the GraphQL world, this tool is called GraphiQL (with an "i" before the QL and pronounced as Graphical). GraphiQL is an open source web application that it is written entirely with React.js and GraphQL itself, and it can simply be run in a browser.
GraphiQL is one of the reasons why GraphQL is popular. It is very easy to learn and it will be a very helpful tool for you. I guarantee that you will simply LOVE it. It is one of my favorite tools for frontend development and I cannot imagine working in a GraphQL-based project without it.
You can download GraphiQL and run it locally but an easier way to get a feeling of what this tool has to offer is to use it with an existing GraphQL API service like the Star Wars one that we previewed earlier.
Head over to graphql.org/swapi-graphql in your browser. The page that loads up under that URL has the GraphiQL editor, which works with the Star Wars data and is publicly available for you to test. Here is what it looks like:
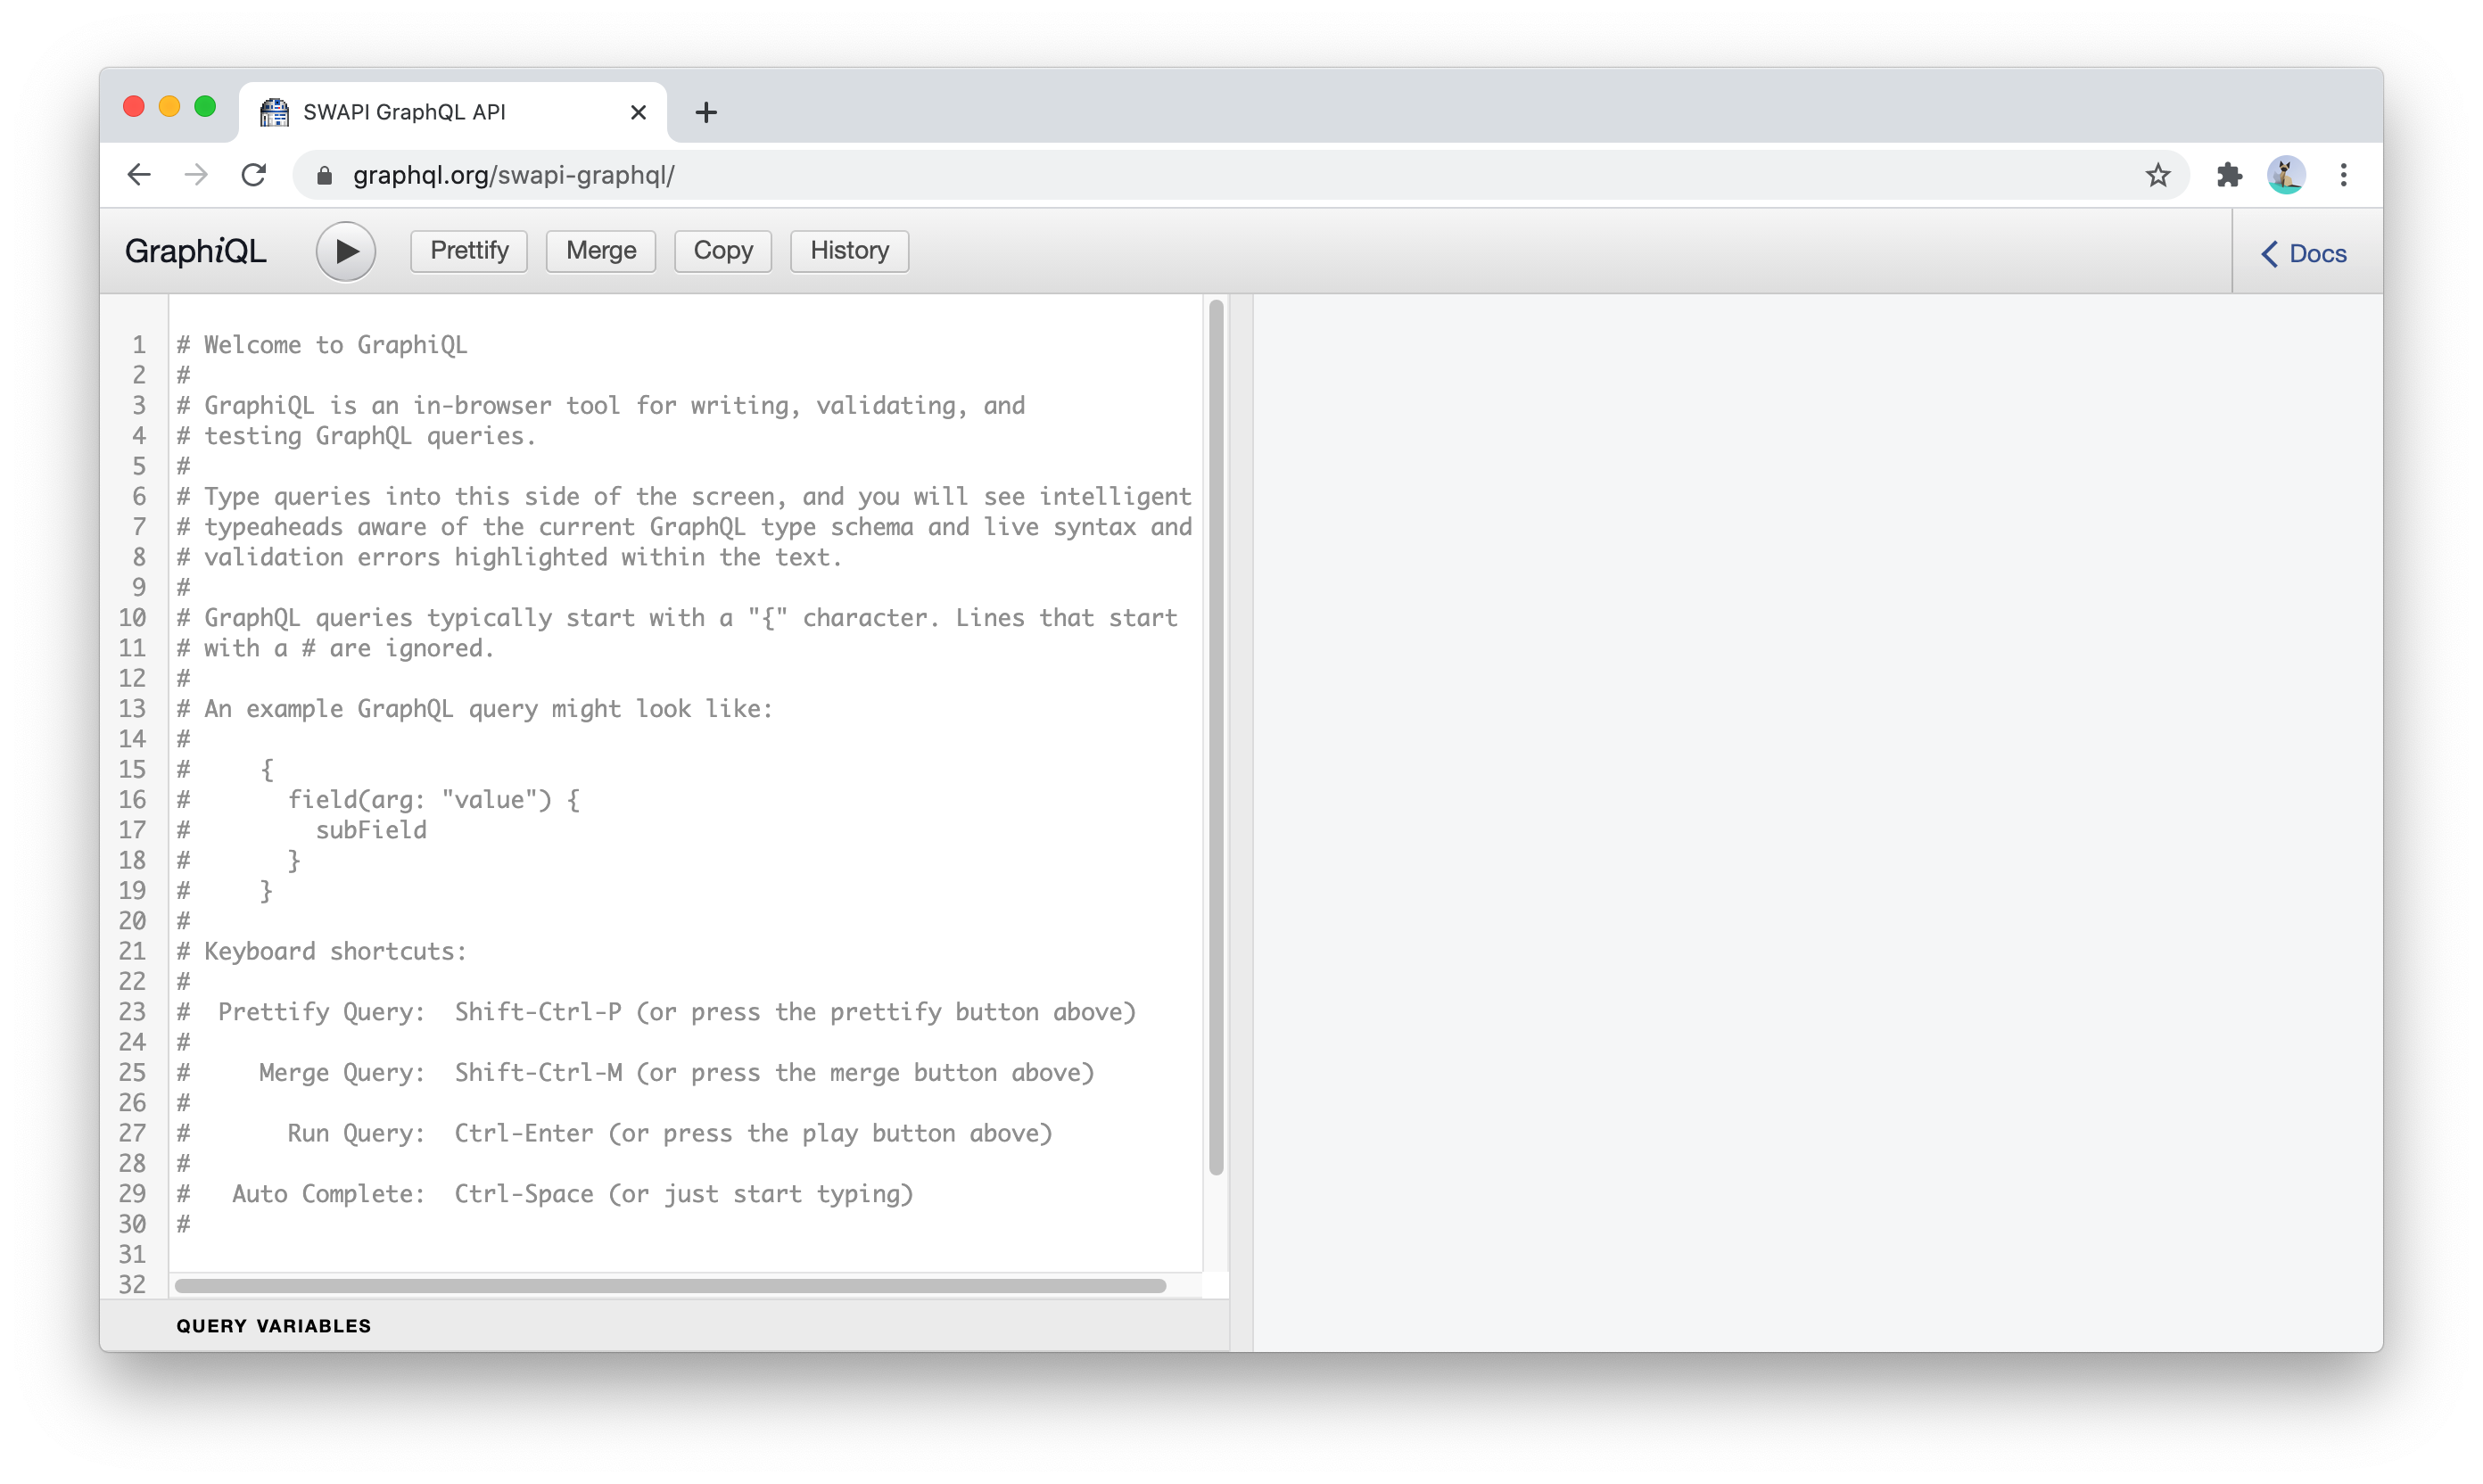
This editor is a simple 2-pane application where the left pane is the editor and the right pane is where the result of executing your GraphQL requests will appear.
Go ahead and type the following simple GraphQL query in the editor:
{
  person(personID: 4) {
    name
    birthYear
  }
}
This simple GraphQL query asks for the name and birth year of the person whose ID is 4. To execute the query, you can press Ctrl+Enter or press the run button (with the little black triangle). When you do, the result pane will show the data that the query is asking for:
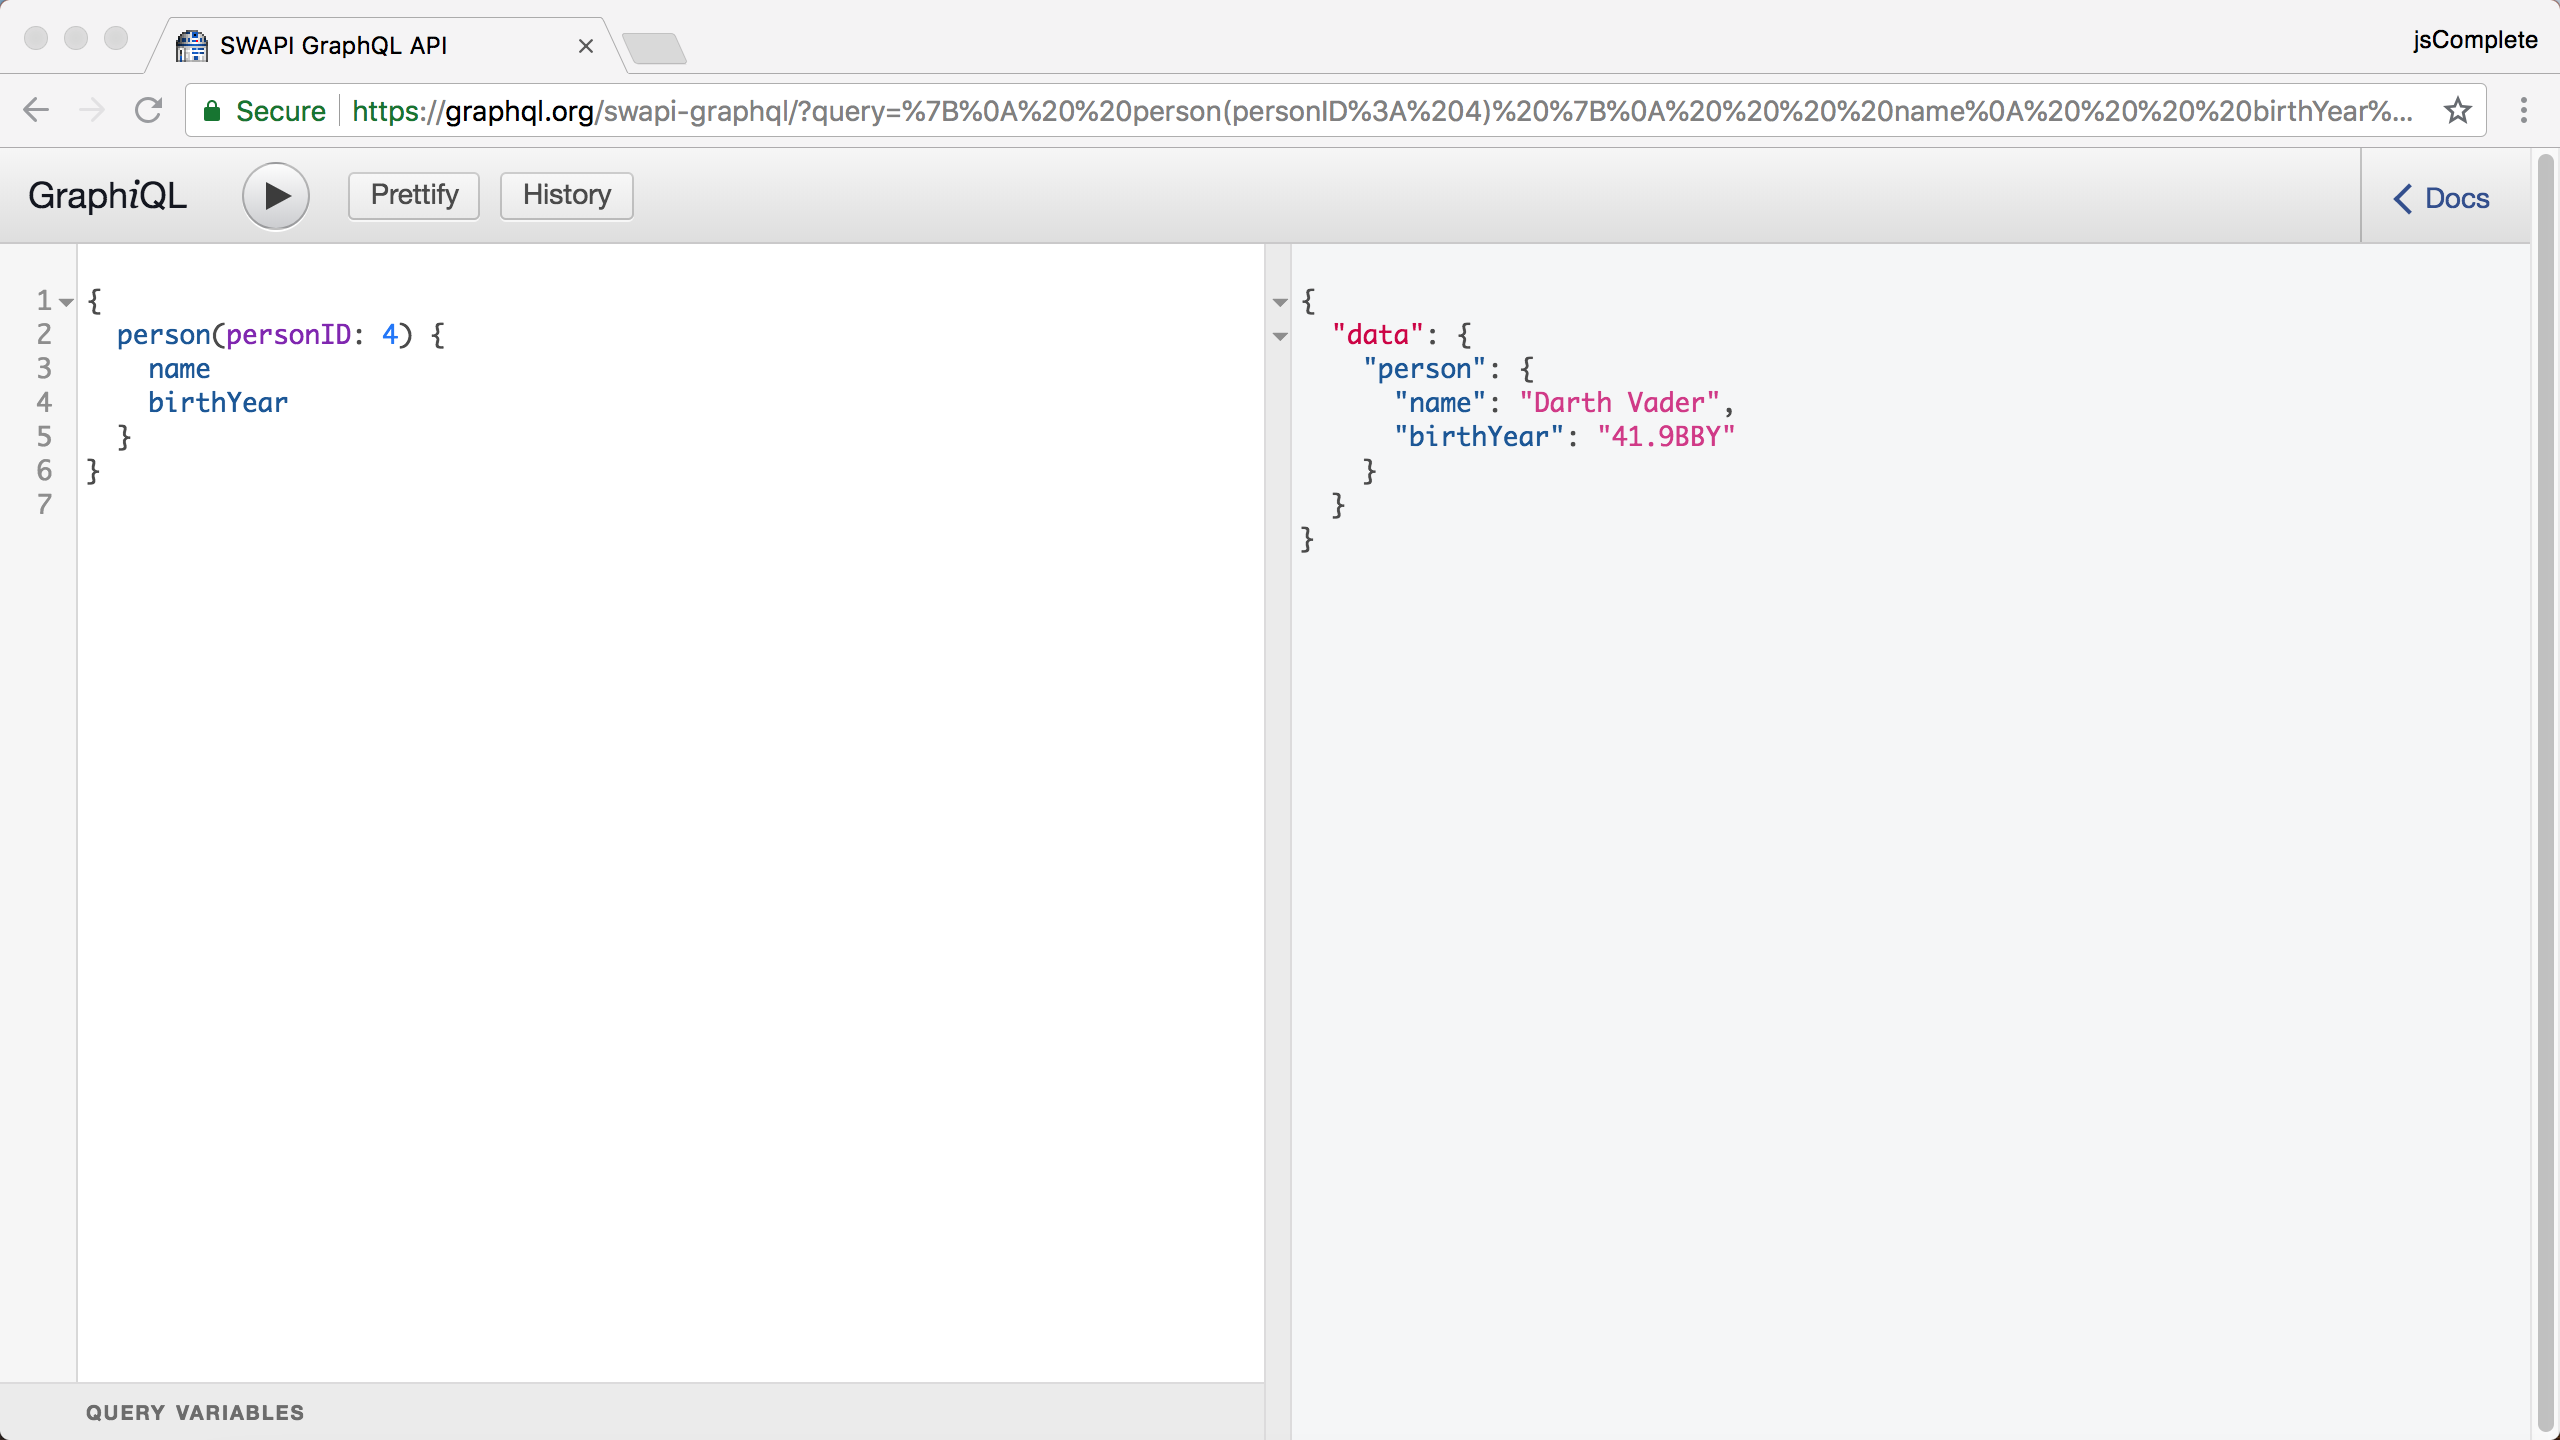
The best thing about this GraphiQL editor is that it provides intelligent type-ahead and auto-completion features that are aware of the GraphQL type schema you are currently exploring. For the previous example, this means that the editor is completely aware that there is a person object that has name and birthYear fields. In addition, the editor has live syntax and validation error highlighting for any text you type.
| The awesome features in GraphiQL are all possible because of the documentation schema which is mandatory for a GraphQL server to publish. |
To explore these features, clear the editor pane (you can select the whole text in the editor with Ctrl+A). Then, just type an empty set of curly brackets: {}. Place your cursor within this empty set and hit Ctrl+Space. You get an auto completion list like this:
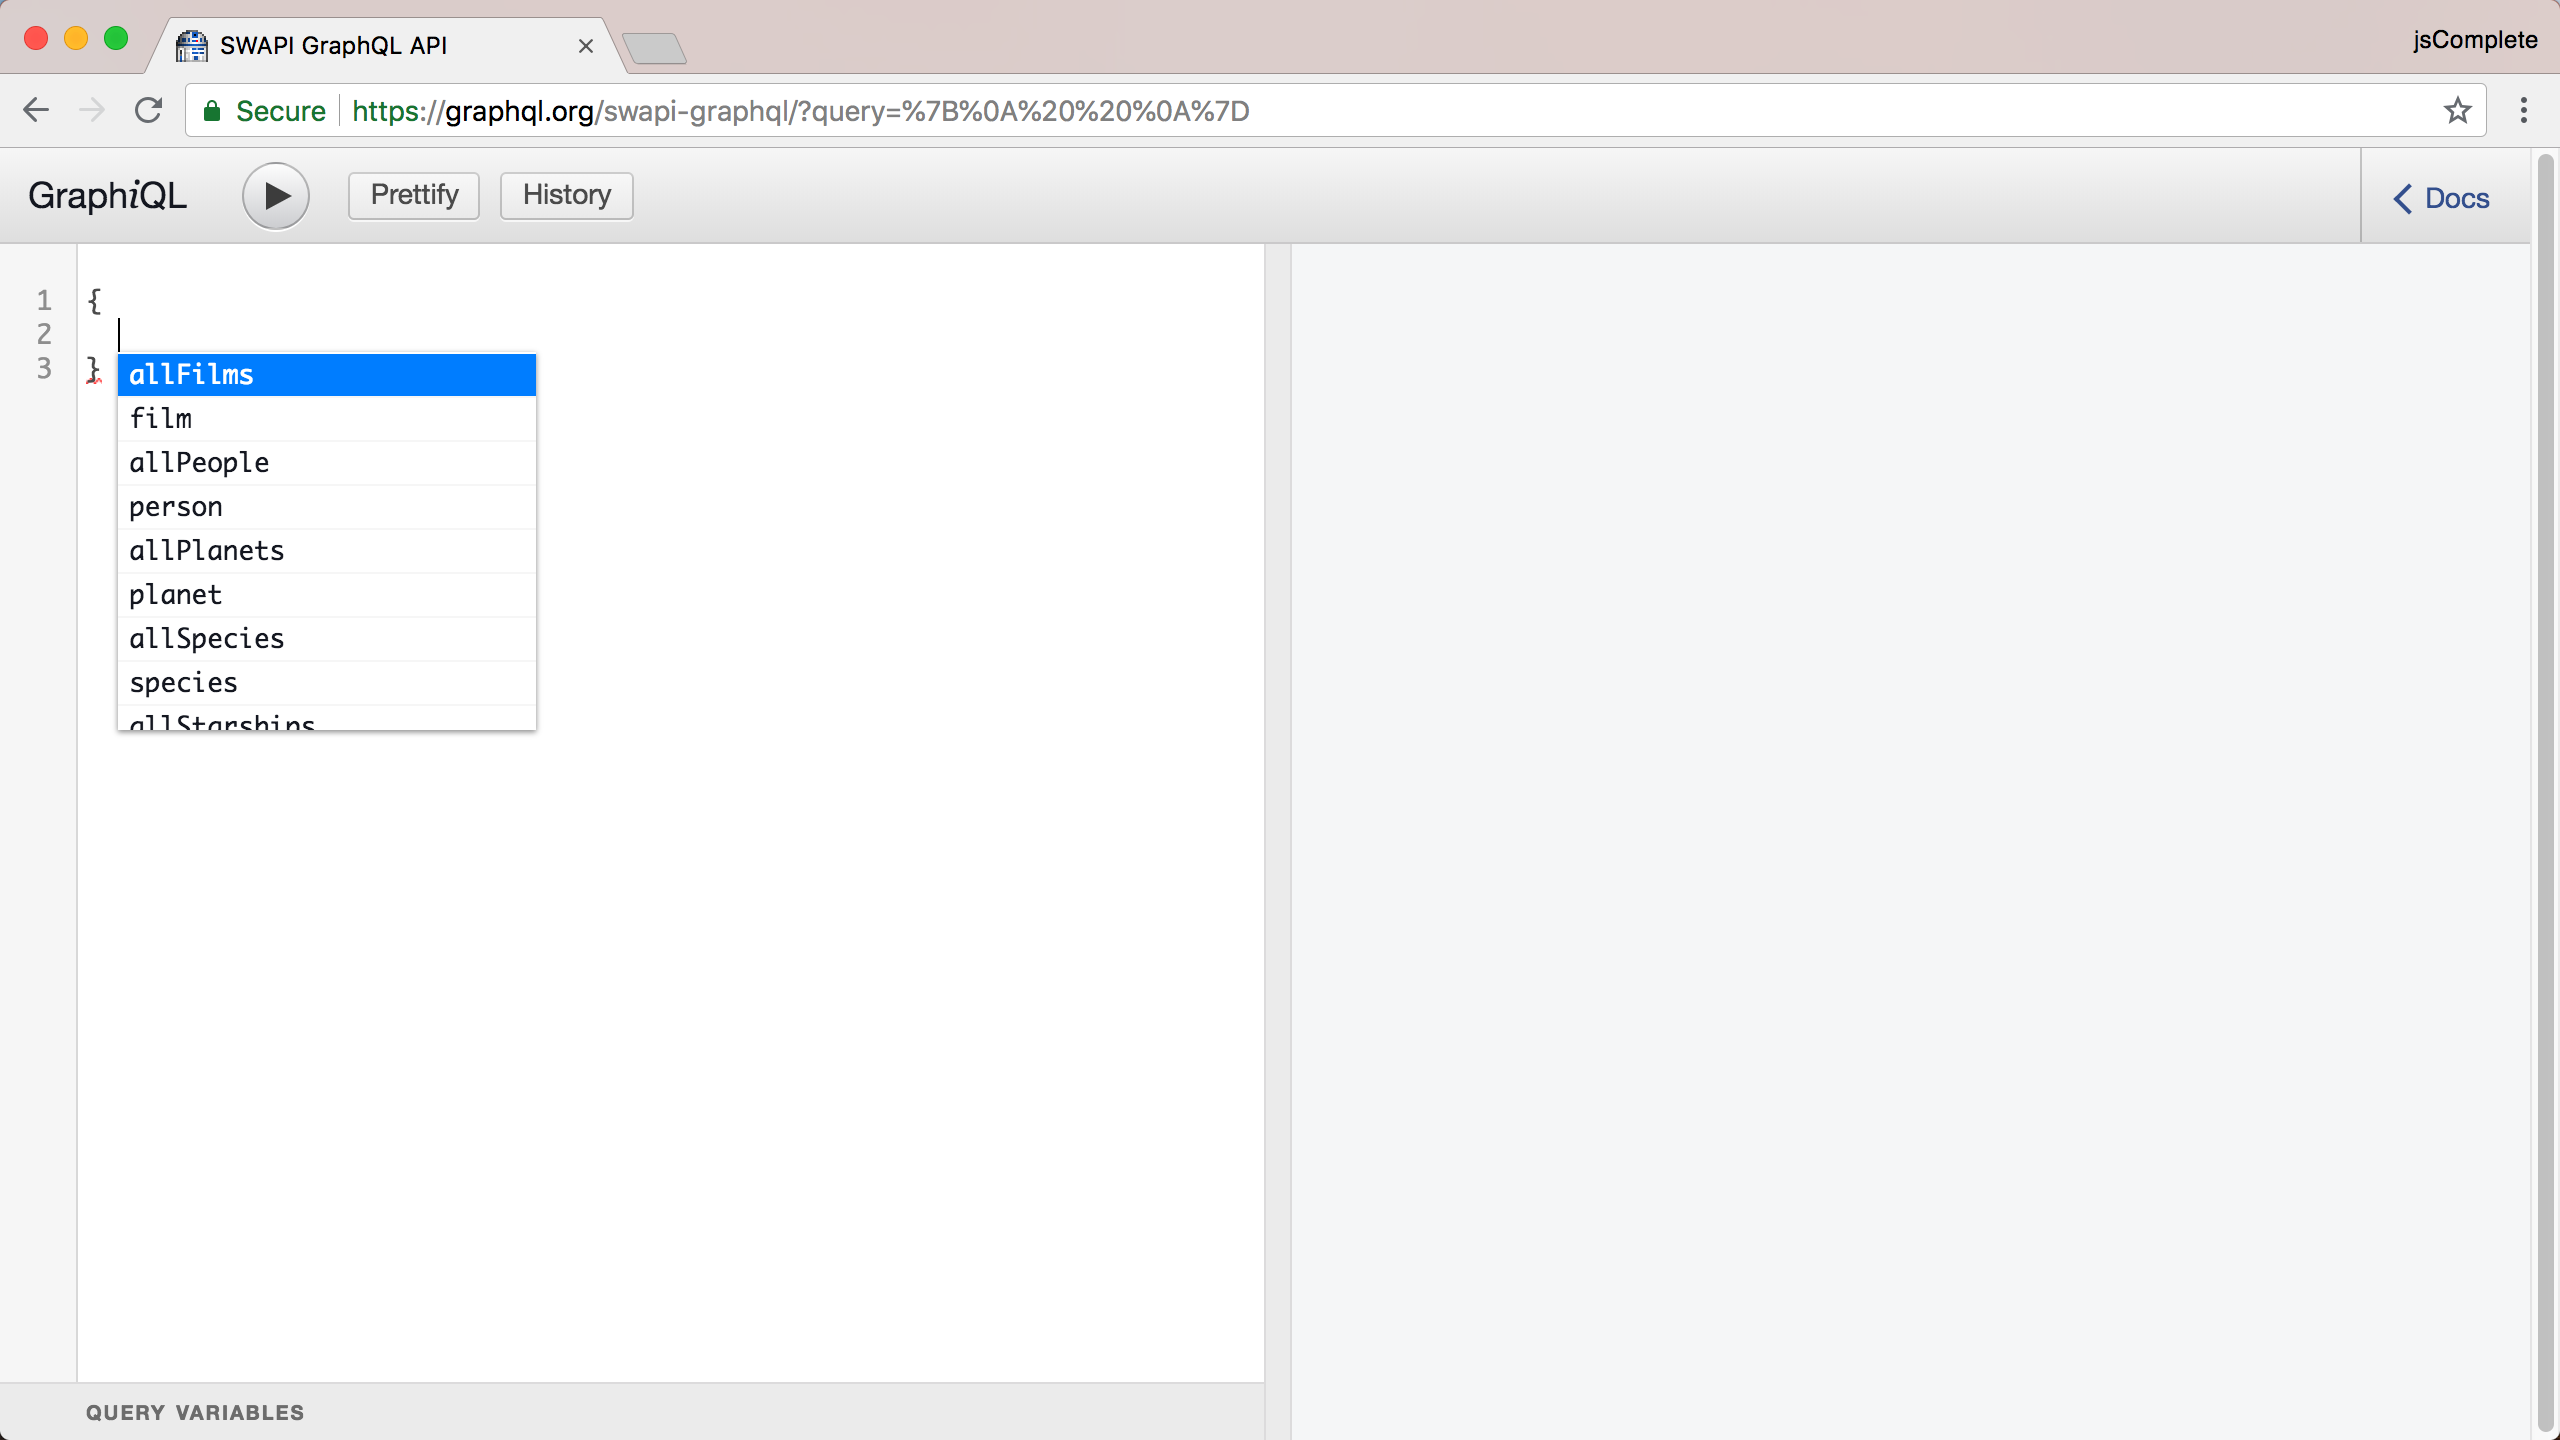
This is nice! You can very quickly start exploring what top-level fields this GraphQL API is offering right there in the editor while you are thinking about your requests. The person field we used before is one of the items in this list.
This list will also be used to auto-complete fields as you type them. Type “p” and notice how the list is now changing to highlight what starts with “p”. Then, continue typing an “e” and see how the list will only highlight the person field. Hit Enter to "pick" the currently highlighted item in the list.
The great thing about this type-ahead list is its accurate context-awareness. It showed you the top-level fields when you were typing at the top-level area and it will show you a different set of fields if you are within another field. For example, now that we picked the person field, go ahead and type another empty set of curly brackets after the word "person" and put your cursor within this new set and bring up the type-ahead list with Ctrl+Space. You should see a new list now and this time the list will have all the fields that you can ask for within the context of a person object!
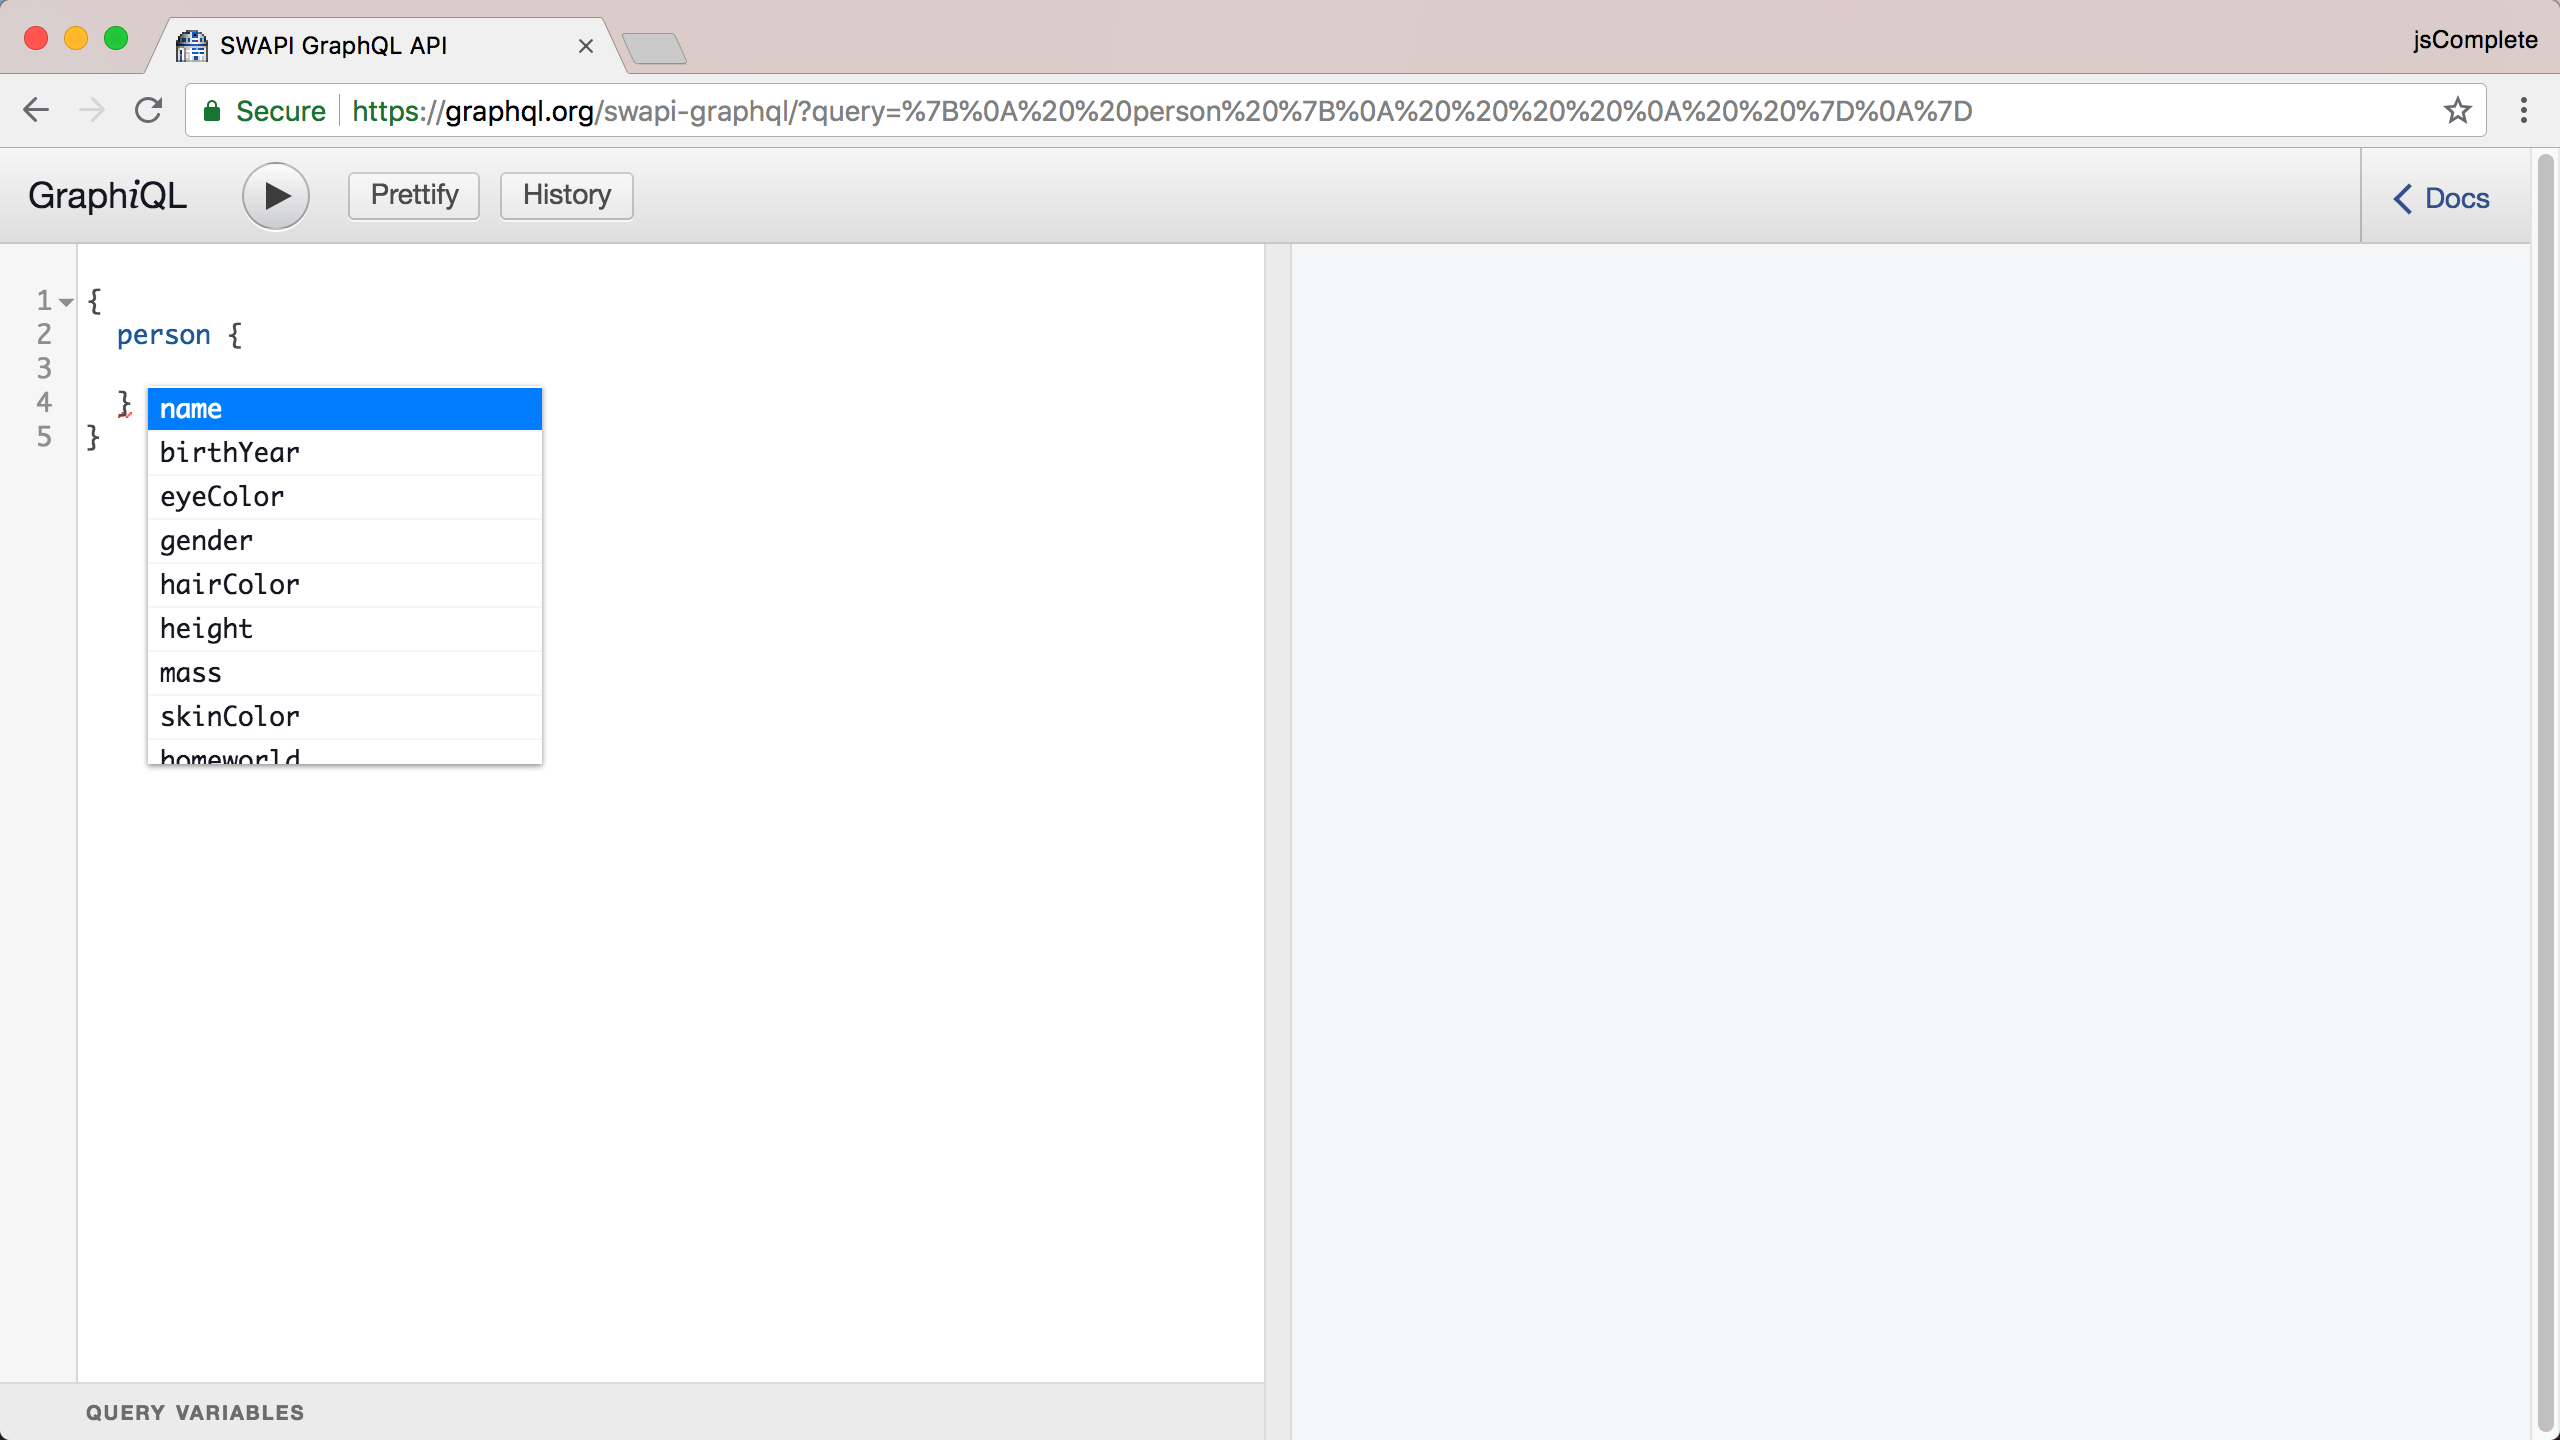
This is extremely helpful, and I am not talking about the less typing aspect of it but rather the discoverability and validation aspects which enable you to be faster and make less mistakes. This is an example of the power and control I was talking about earlier. This is how GraphQL is different.
Before we pick the fields name and birthYear again, note how one of the closing curly brackets has a red underline. This is part of the live error highlighting you also get in this tool. Discard the type-ahead list by pressing Esc and hover your mouse cursor over that underlined curly bracket. You should see an error complaining about some unexpected syntax. This is because the text we have in the editor so far is not valid GraphQL syntax yet. Every time you start a new level of curly brackets, which by the way is named a selection set in GraphQL, that selection set needs to have fields of its own.
Go ahead and pick the fields name and birthYear within the person field. The query syntax is now valid (the red underline is gone) but the query is still missing one important piece, and this time, it is not a syntax problem.
You can always execute the query to see what the server has to say about it. If the server rejects the query, it will most likely give you a good reason why it did. For example, executing the query we have right now will return the following:
{
  "errors": [
    {
      "message": "must provide id or personID",
      "locations": [
        {
          "line": 2,
          "column": 3
        }
      ],
      "path": [
        "person"
      ]
    }
  ],
  "data": {
    "person": null
  }
}
Note how this error response was a normal JSON response (a 200-OK one) and how it is giving us back two top-level properties: one errors property that is an array of error objects and a data property that represents an empty response. A GraphQL server response can represent partial data when that server has errors about other parts of the response. This makes the response more predictable and makes the task of handling errors a bit easier.
The error message here was a helpful one. The path "person" must provide id or personID. Since we are asking the server about ONE person, it needs a way to identify which person’s data to return. Note again that this was not a syntax problem but rather a missing-required-value problem.
To make a path provide a value, we use syntax similar to calling functions. Place the cursor right after the word "person" and type the "(" character. GraphiQL will auto-complete that with ")" and show you a new type-ahead list that, this time, is aware of what values can be provided as arguments for the person field.
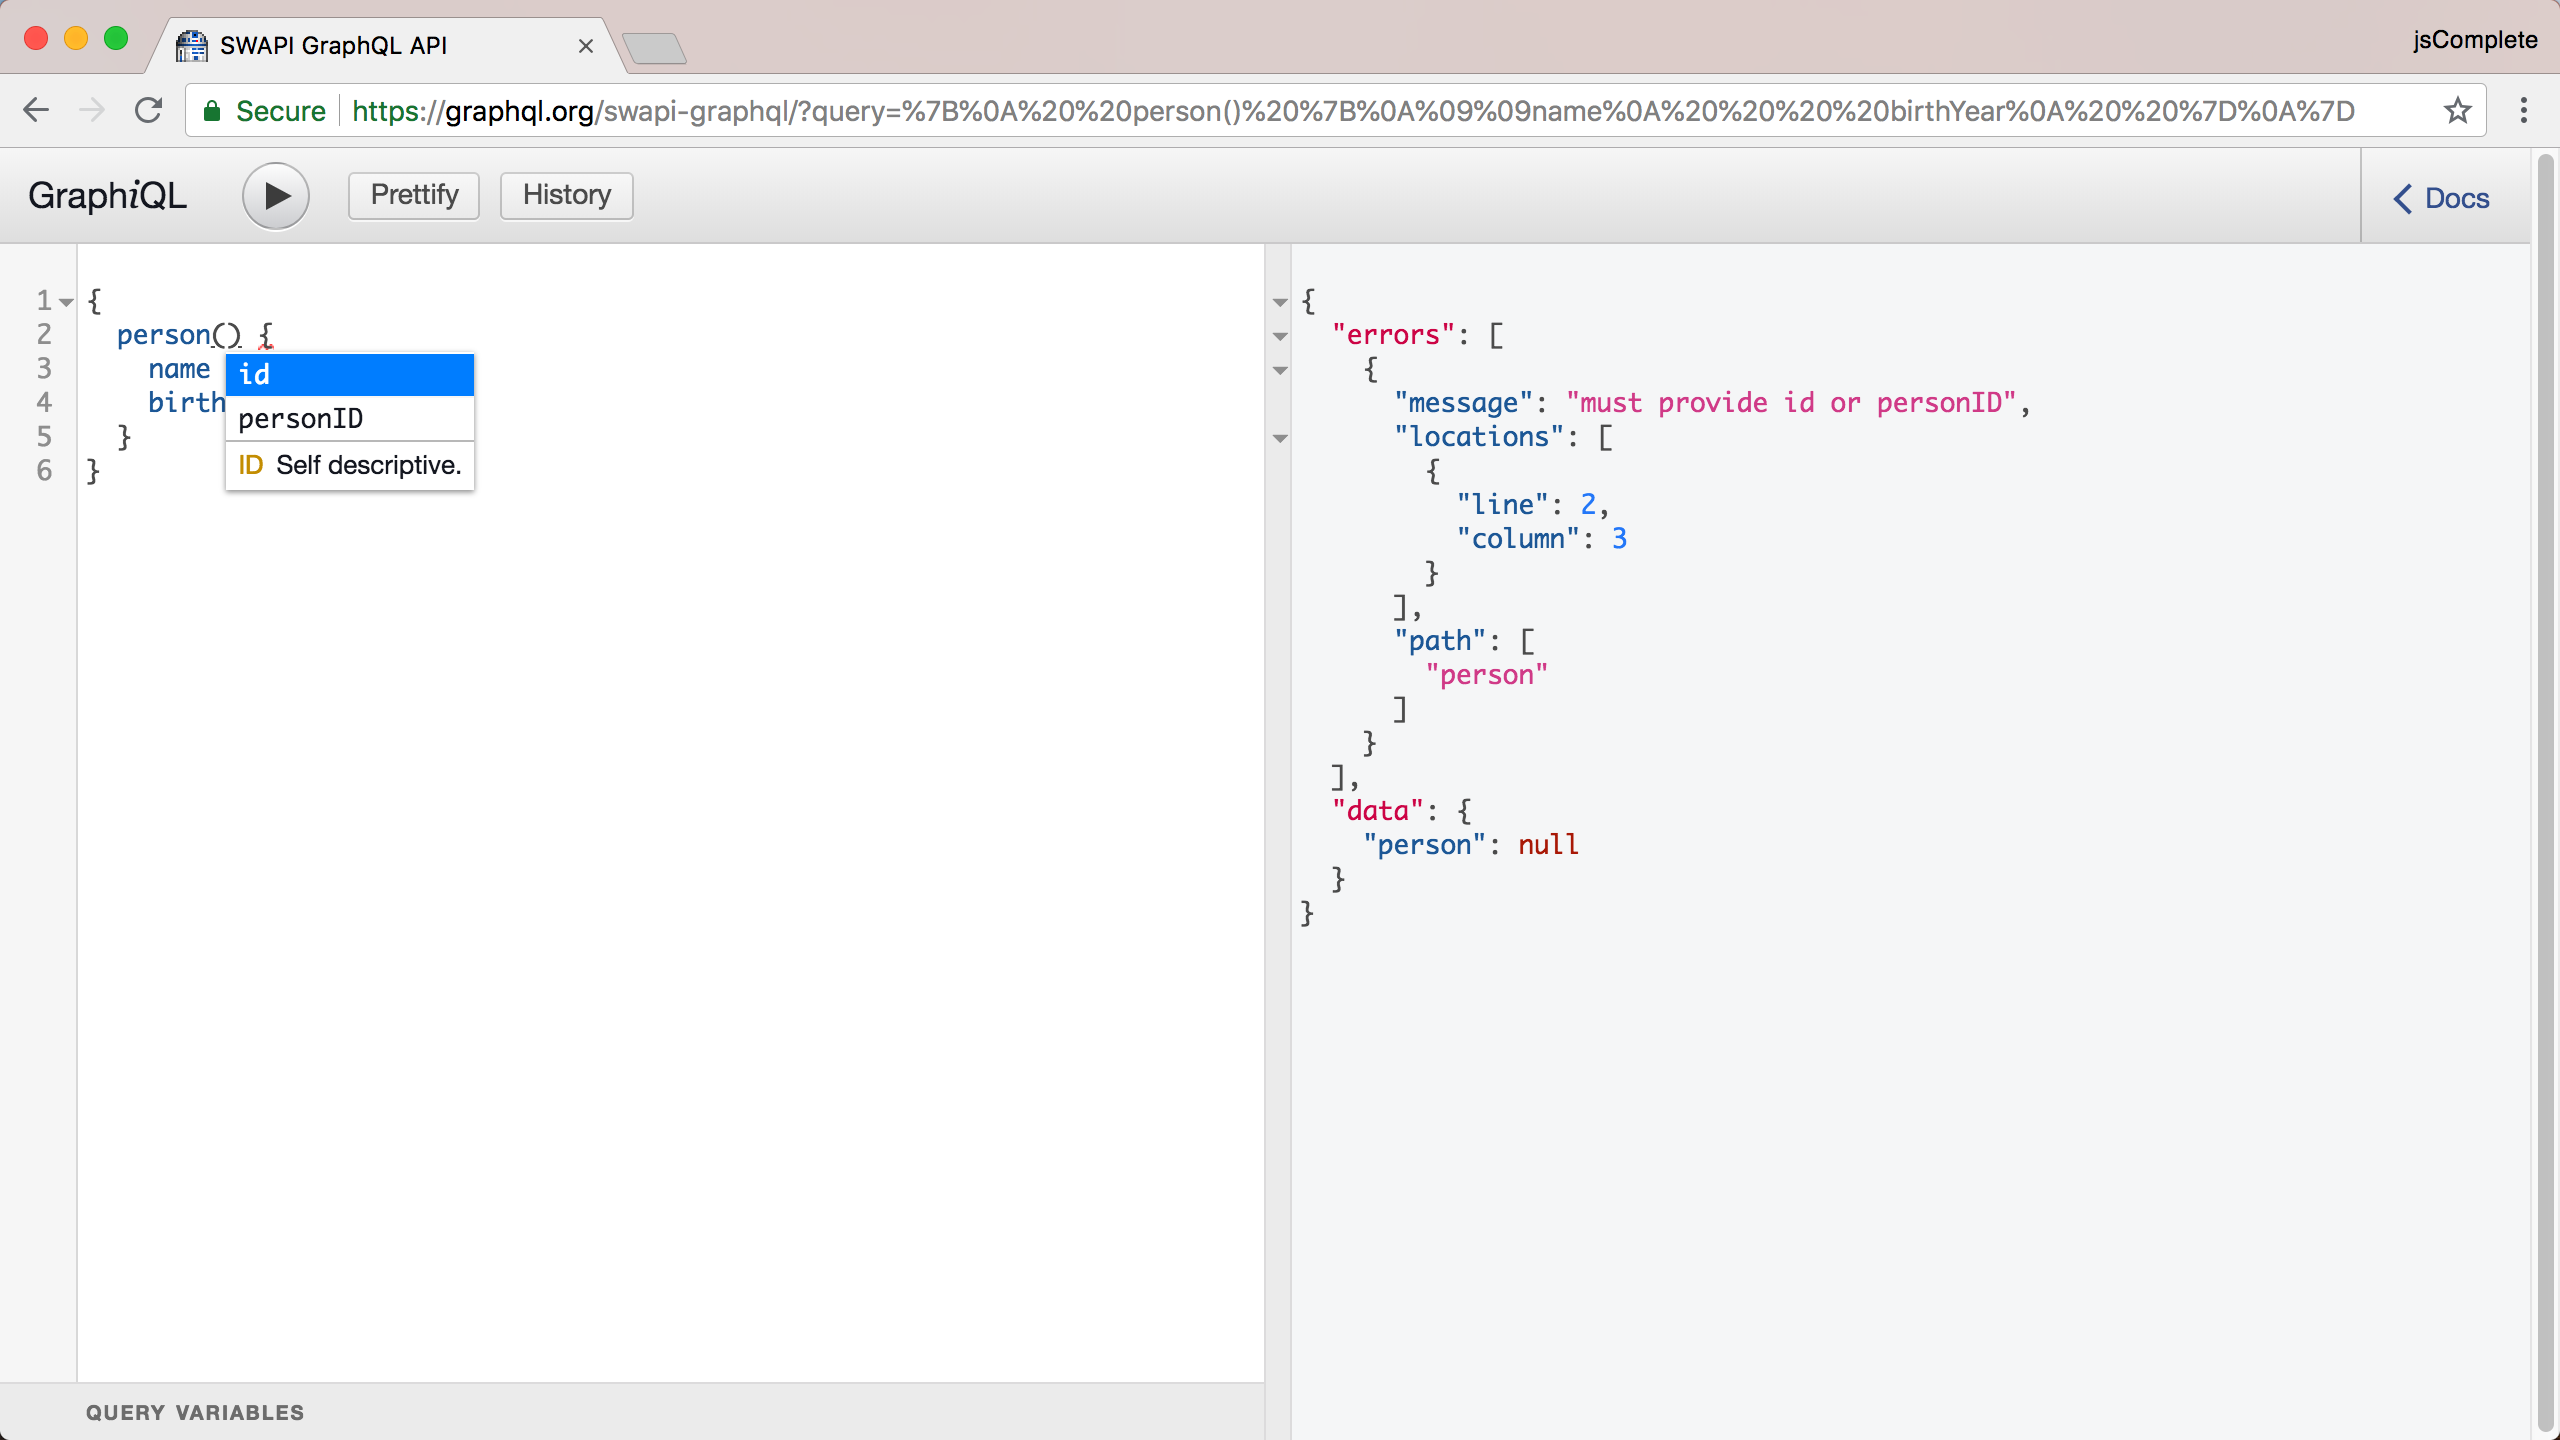
Now you can pick the personID argument, give it a value of 4, and get back to the same query that we started with, but this time, you discovered the elements that you needed through the powerful features of the GraphiQL editor.
Besides discovering the structure and types of these elements inline while you type them, you can browse the "Docs" section to see full lists and more details about them. Click the "Docs" link in the top-right corner of the editor. You should see a search box that you can use to find any type within the current GraphQL schema. I typed the word "person" and picked the first result. This is showing the schema type "Person" with its description and fields:
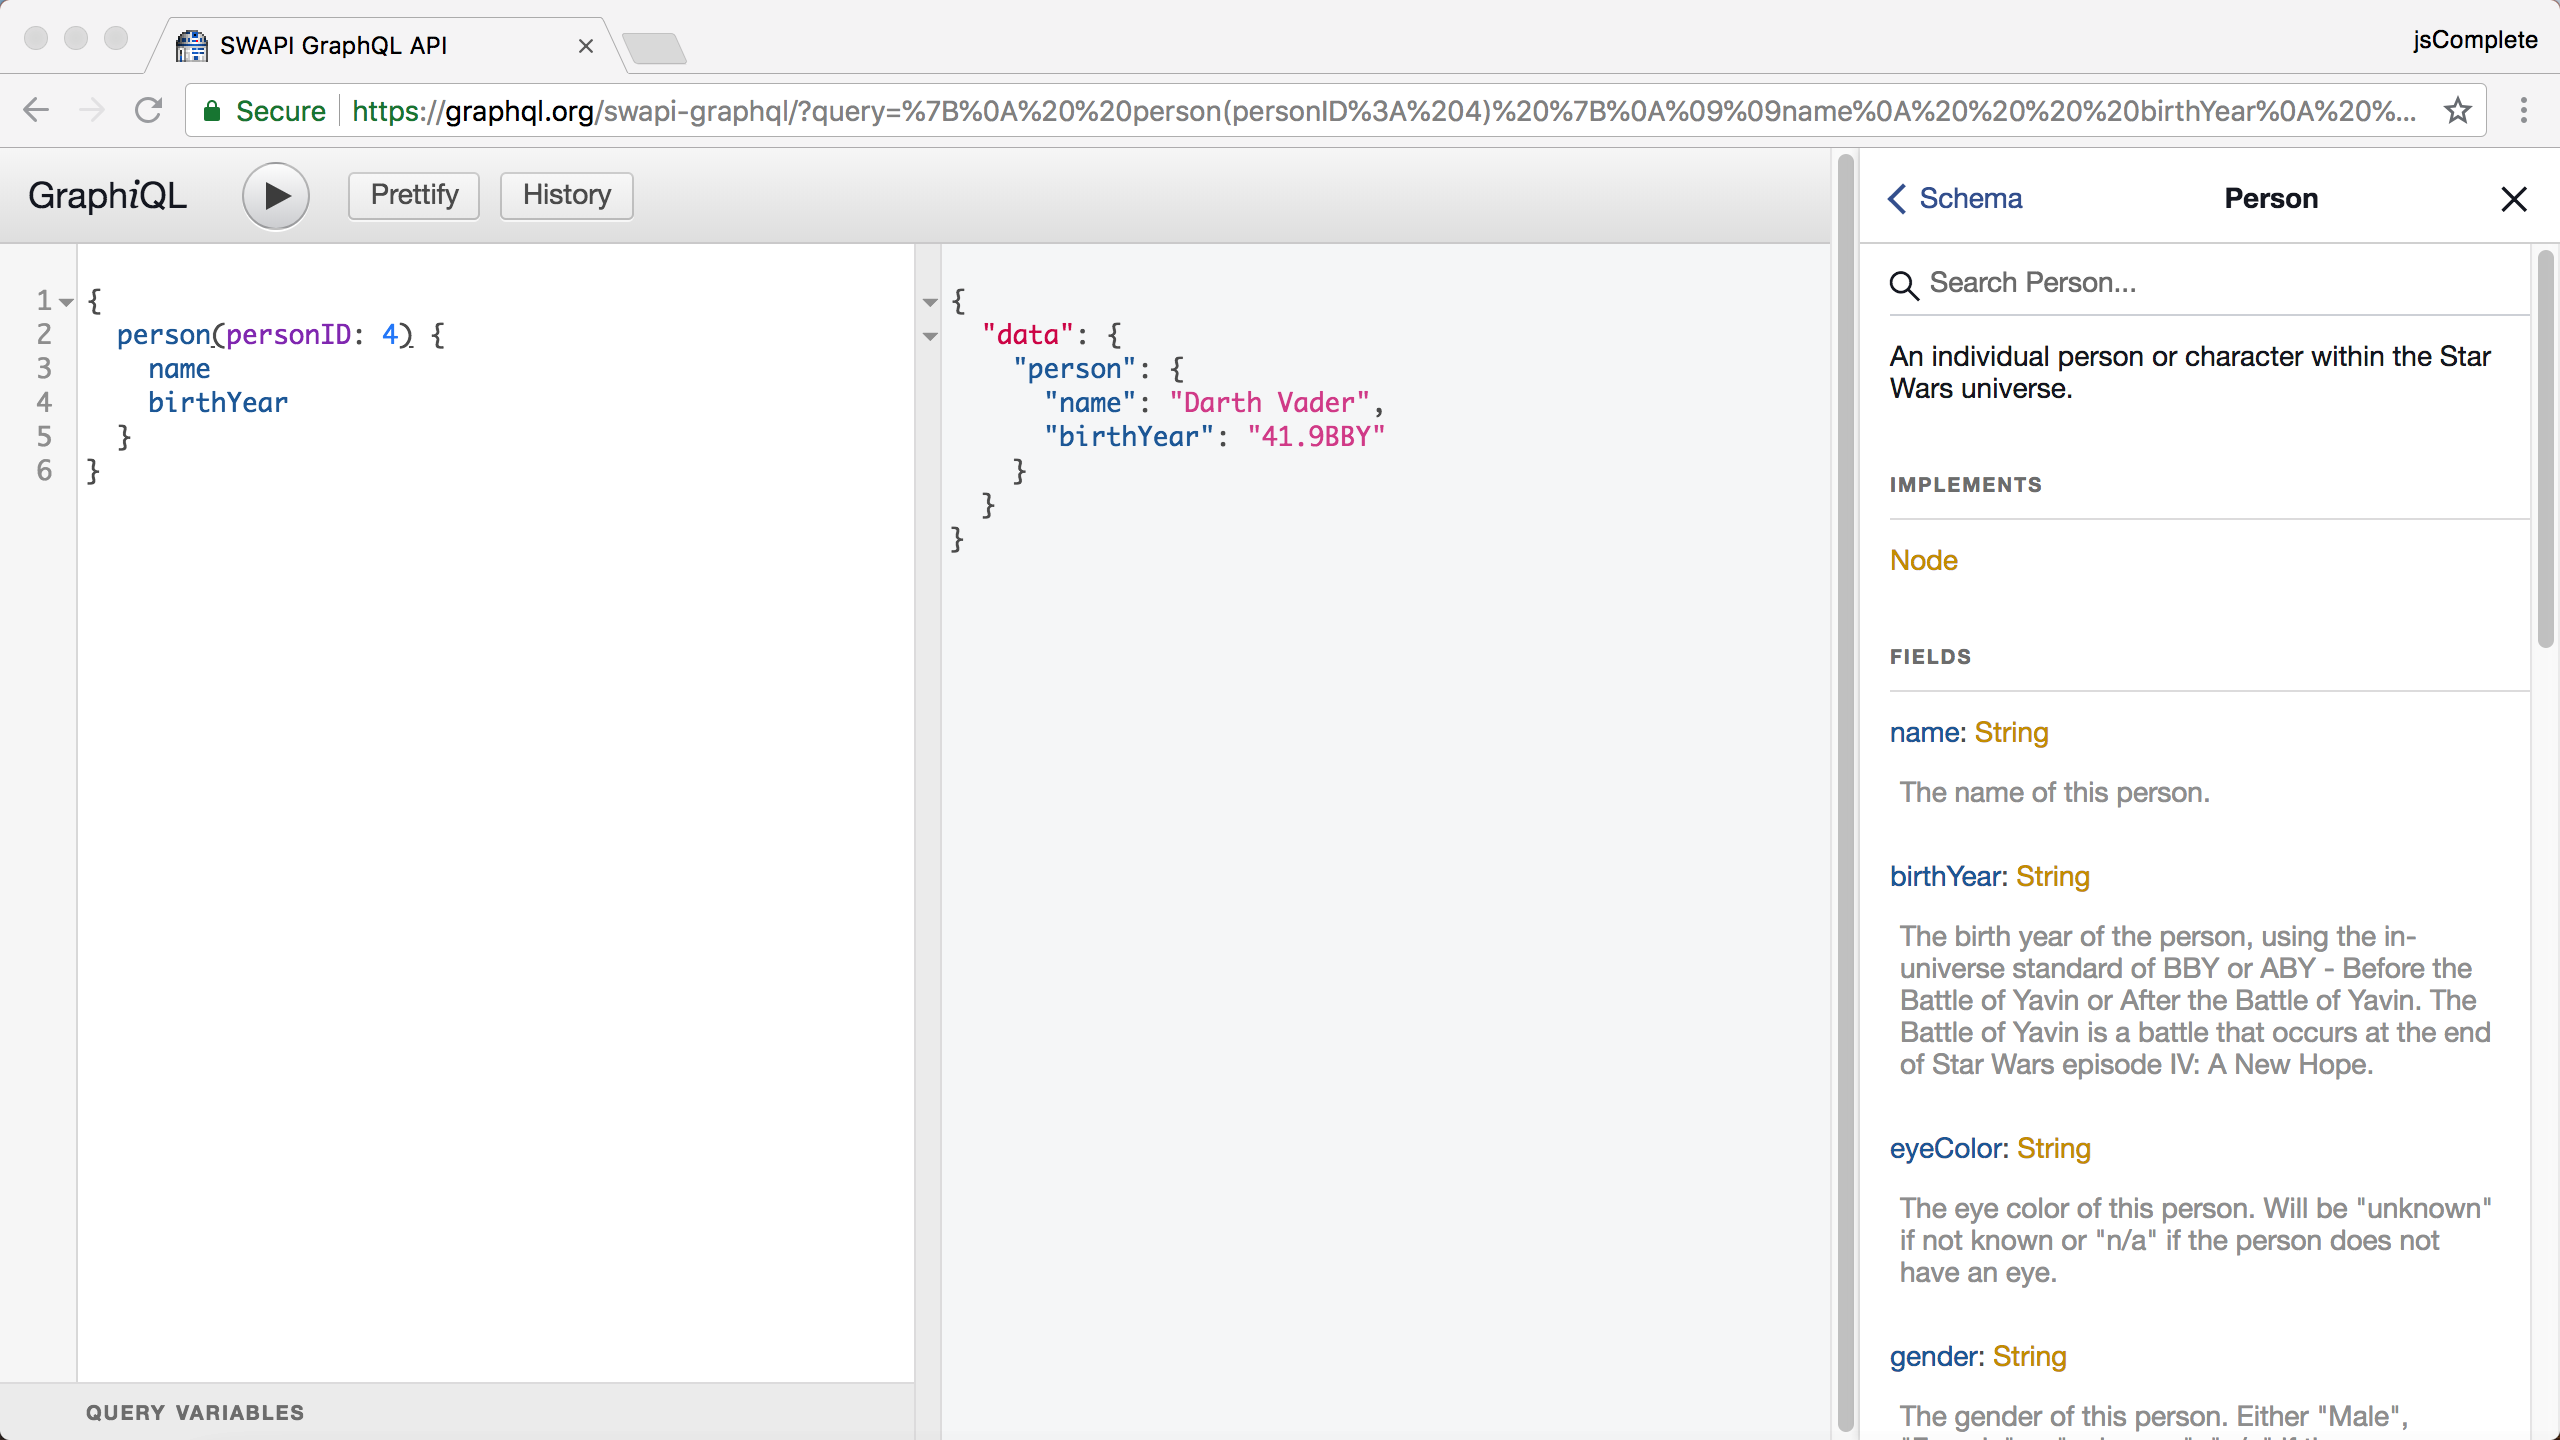
Take a moment to explore more of what this GraphiQL editor has to offer. Try more queries and get a feeling of how easy it is to come up with them.